Xero Client Portal: Document Storage Guide
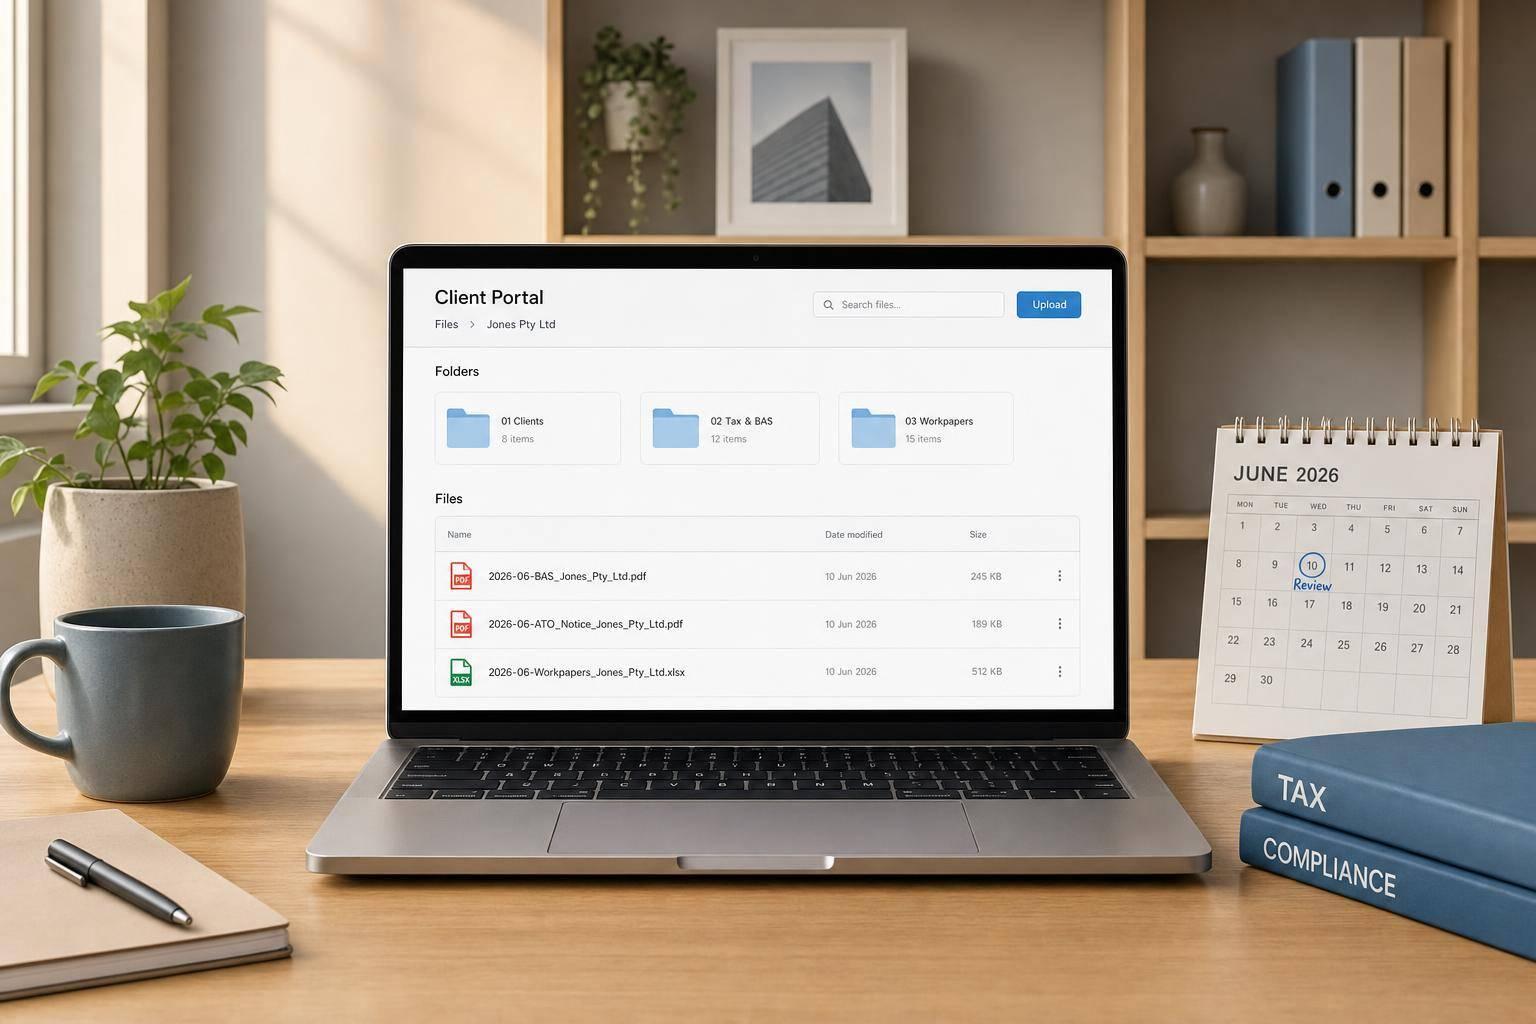
Xero Client Portal: Document Storage Guide
If you run a business in Australia, your filing system should do 3 things: keep records for the right number of years, make documents easy to find, and limit access to payroll and tax files.
I’d sum the guide up like this: set one folder structure, use one file naming rule, and review the archive at month end, quarter end, and year end. That covers the main record groups in a Xero-linked portal: invoices, bills, BAS and IAS papers, tax returns, payroll records, asset files, year-end packs, and permanent business records.
A few points matter straight away:
- ATO record-keeping rules matter: many tax and GST records must be kept for at least 5 years
- Payroll records usually need 7 years
- Asset and CGT records often need to stay longer, based on sale or last claim dates
- Xero and the portal do different jobs: Xero links files to transactions, while the portal holds broader business and compliance records
- Poor naming slows search: a file like
Scan_001.pdftells you nothing - Access should be role-based: not every staff member should see payroll, TFN, or internal tax files
- 2FA and encrypted storage are baseline security steps
I’d use a simple setup: Entity → Financial Year → Record Type → Period, then name files with the date, party name, document type, and amount or period. For example, a supplier bill, BAS statement, payroll summary, and tax return should each follow one clear naming pattern so you can spot them fast during BAS, EOFY, or an ATO review.
This gives you a filing system that stays tidy, searchable, and in line with Australian record rules.
Xero Filing System Explained | Organise Your Documents in Xero

sbb-itb-98a37a2
Set up a folder structure that matches your business records
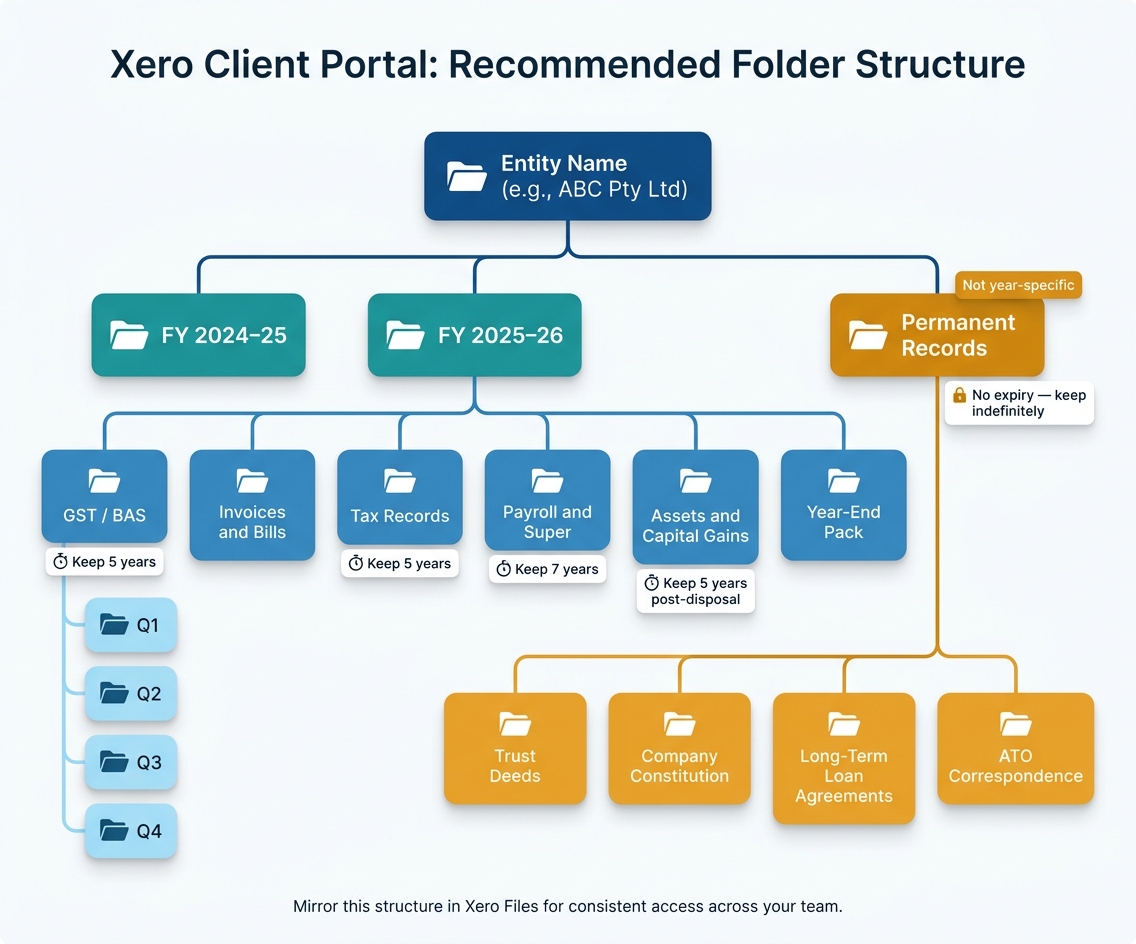
Xero Client Portal Folder Structure for Australian Businesses
A clear folder structure makes life easier. You, your bookkeeper, and your tax agent should all be able to find the right file without digging around. The simplest setup is this: entity → financial year → record type → period.
Start with one folder for each entity, then place one FY folder under it.
Start with one client folder and financial-year subfolders
Create one top-level folder for each entity you run. If you have a sole trader, company, or trust, each one should have its own folder.
Under each entity, add a subfolder for each Australian financial year. Label them in the local format: FY 2025–26, FY 2024–25, and so on. That keeps each lodgement period separate and stops records from different years getting mixed together.
Add core subfolders for BAS, tax, invoices, payroll and finance
Inside each FY folder, keep the subfolders lean and consistent. A practical layout looks like this:
| Subfolder | What goes in it |
|---|---|
| GST/BAS | Q1–Q4 subfolders with BAS worksheets, GST detail reports, bank reconciliations |
| Invoices and Bills | Sales invoices and supplier bills |
| Tax Records | Tax returns, ATO notices, depreciation schedules |
| Payroll and super | Single Touch Payroll (STP) reports, payslips, superannuation payment confirmations |
| Assets and capital gains | Purchase and sale contracts, improvement costs |
| Year-end pack | Final bank reconciliations, trial balance, debtor/creditor listings, asset register |
| Permanent records | Trust deeds, company constitution, long-term loan agreements, ATO correspondence |
General tax and GST records must be kept for at least five years from the date of lodgement, payroll and employment records for seven years, and asset, depreciation and CGT records for five years after the asset is disposed of or the last claim is made.
The Permanent records folder should sit outside the FY folders. Those documents don’t reset each year, so keeping them separate saves confusion later.
Once this structure is locked in, search and access control get much easier. It also helps new staff or advisers get up to speed fast, because the layout stays the same wherever they look.
Mirror the same hierarchy in Xero Files so staff and advisers use the same structure.
Why consistent folder rules matter for client uploads
The Priory Books and Tax uses a secure client portal to collect documents in one consistent structure for BAS, payroll and year-end work.
That kind of consistency matters more than people think. If one client uploads payslips into payroll, another drops them into tax, and a third emails them separately, work slows down fast.
Once the folder tree is set, apply the same logic to file names and uploads.
Name files clearly and upload them to the right place
Once your folder tree is locked in, file naming becomes the next checkpoint. This is what helps each document line up with the right Xero entry at a glance. A good file name should show the entity, the period, and the document type without making anyone dig for context.
Use a standard file naming format
A simple format that works well is: YYYY-MM-DD_Supplier-or-Client_Document-Type_Amount-AUD.
That gives you the date first, then who the document relates to, then the document itself, and finally the amount in AUD. Clean, easy to scan, and hard to mix up.
Some document types need one extra detail to make them easier to track:
| Document Type | Example File Name |
|---|---|
| Supplier bill | 2026-06-18_SupplierName_INV-999_550-AUD.pdf |
| Client invoice | 2026-06-18_ClientName_INV-001_1200-AUD.pdf |
| BAS statement | 2026-Q4_BAS-Statement_BusinessName.pdf |
| Payroll report | 2026-06-15_Payroll-Summary_PPE-2026-06-14.pdf |
| Tax return | FY2026_Income-Tax-Return_Final.pdf |
For bills, add the supplier invoice number. For BAS, use the quarter label. For tax files, use the FY label. For payroll, include the pay period end date.
How to upload files step by step
The upload part is pretty quick once the file is clean and ready. Scan paper records to PDF, or export reports you’ve already run in Xero. The ATO accepts electronic images as long as they are clear, accurate copies of the original.
Then do this:
- Log in to the client portal securely.
- Open the correct entity folder, then the right FY subfolder and document-type folder.
- Drag and drop the file, or use bulk upload if you have several at once.
Xero also gives each file library its own email address. So if a supplier emails you an invoice, you can forward it straight to that address and it will land in Xero Files automatically, ready to be linked to the matching transaction.
How uploaded files support Xero bookkeeping
When you attach each source document to its Xero transaction, you create a clear audit trail. That makes it easier for your bookkeeper to check amounts and GST during reconciliation. The same files can also help if the ATO reviews your records or a lender asks for backup documents.
Consistent naming and the right upload location also make search and access control much faster in the next stage.
Find documents fast and control who can see them
Once files are uploaded, the next job is simple: find them fast and make sure the right people can access them.
Search by name, folder, date, file type and tags
Xero-linked portals let you search by name, folder, date, file type, or tag.
| Method | Best For | Best Use | Limitations |
|---|---|---|---|
| Search bar | Finding a specific file when you know its name or number | Fastest method if naming is consistent | Fails if the file name is vague (e.g., Scan_001) |
| Folder navigation | Browsing all documents for a specific FY or document type | Gives you clear context and structure | Can be slow if folders are nested too deeply |
| Filters and tags | Isolating a category across multiple years (e.g., all BAS files) | Great for bulk retrieval by type or date | Only works well if tags are applied consistently at upload |
If your filing setup is tidy, retrieval becomes a lot less painful. A search bar is usually the fastest option, but only if file names make sense. Folder navigation helps when you want to see the full picture for a given FY or document group. Tags and filters are handy when you need to pull a set of files across years, like every BAS document in one go.
After retrieval is sorted, the next step is to lock down access to payroll and tax files.
Set permissions for owners, staff and advisers
Use role-based access so owners, staff, and advisers only see the folders and actions they need. That means not everyone should have the same view or editing rights.
Sensitive folders, such as payroll or internal workpapers, should be limited to authorised users. It’s also smart to review access every quarter so permissions stay current as your team changes.
Security basics for tax and payroll records
Payroll and TFN records need tighter controls than general bookkeeping files. The baseline steps are straightforward: enable two-factor authentication (2FA) for every user and use encrypted storage.
At The Priory Books and Tax, portal access is limited to authorised users to protect TFN and payroll data.
Keep your document archive tidy, compliant and useful over time
Once filing and access are sorted, the last step is keeping the archive current. A portal only stays useful if someone looks after it. Leave it alone for too long and folders start to clog up with duplicate files, vague names and old documents no one should be using. Regular upkeep helps keep month-end, BAS and EOFY records easy to find when you need them again.
Review folders at month end, quarter end and year end
The simplest way to stay on top of this is to link clean-ups to work you already do. After monthly bookkeeping, check that transactions have supporting documents attached. After each BAS quarter, make sure BAS papers, activity statements and related correspondence sit in the right financial year folder. At year end, confirm the prior FY is complete before opening the new one. This ensures you have everything ready for your small business tax return. Keep digital copies that are clear and complete.
Avoid duplicates and mark the latest version clearly
Duplicate files chew up time and make version history messy. Before you upload anything, check whether the file is already there. If you're working through more than one draft, like a revised payroll summary or an amended BAS, label each version clearly with names such as v1, v2 or Final.
Good versus poor storage habits at a glance
The same habits matter whether you're filing one invoice or a full year-end pack.
| Habit | Good Practice | Poor Practice |
|---|---|---|
| Folder structure | Organised by financial year and document type | All files in one miscellaneous folder |
| File naming | Consistent format, e.g. YYYY-MM-DD_Type_Vendor |
Vague defaults like Scan_001.pdf or Document1 |
| Version control | Clear labels: v1, v2 or Final |
Multiple copies with no indication of which is current |
| Maintenance | Monthly filing checks and quarterly folder audits | Only filing during year end or an audit |
| Access | Role-based permissions for authorised staff and advisers | Unrestricted access or a single shared login |
FAQs
How long should I keep each record type?
To comply with the ATO, keep accurate records for at least five years from the date of lodgement. Those records need to clearly show income, expenses, and GST details.
If you're a registered tax practitioner, the rule is a bit different. Keep records for at least five years after the tax agent service is complete. Once that period ends, decide whether to return, destroy, or de-identify the documents in line with privacy laws and your record-keeping arrangements.
What’s the best folder structure for my portal?
Use a steady folder structure built around entity, financial year, and tax category. A simple setup looks like this: Entity Name > 2025–26 > GST-BAS by quarter, Payroll-Super, and Year-End.
If your Xero file library only gives you one folder level, use clear prefixes to group folders alphabetically and make them easier to find. For example:
- A – Bank
- C – Customers
- S – Suppliers
Who should have access to payroll and tax files?
Access to sensitive payroll and tax files should be limited to authorised people who need them for specific tasks, such as your accountant, bookkeeper or designated team members.
With Xero’s customisable access levels and secure client portal, each user only sees or manages the documents tied to their role, which helps prevent unauthorised access.